What Has Happened to RimFire Technologies?
RimFire Technologies, a company known for its commitment to innovation, has unfortunately closed its doors. They were renowned for their cutting-edge solutions that pushed past performance limitations. Their high-performance products, including Barrels and 10/22 accessories, were unmatched in the industry.
The company was based in Spokane, Washington, nestled in the Northeast corner of the state close to Coeur d’Alene, Idaho. The area was renowned for its stunning natural beauty and abundant recreational opportunities, making it the perfect place for a company focused on excellence.
Although not affiliated with RimFire Technologies, AnthonyArms Brand has taken it upon themselves to acquire the domain and revive the site’s gun-related content.
Address:
P.O. Box 19098
Spokane, WA 99219
Technical support:
(712) 746-3473
About RimFire Technologies
This recently closed company was a specialist in the customization, parts, and accessories for Ruger 10/22 and Marlin rimfire firearms. They offered custom 10/22 builds and a comprehensive line of parts for the do-it-yourself Ruger 10/22 or 10/17 builder.
The company was dedicated to innovation and quality in the rapidly growing rimfire market. Their precision parts, including barrels, provided shooters with a new level of accuracy and customization options. They were recognized for their expertise in the field and were featured in Small Caliber News in the spring of 2008, where they were named “The next 10/22 savant”.
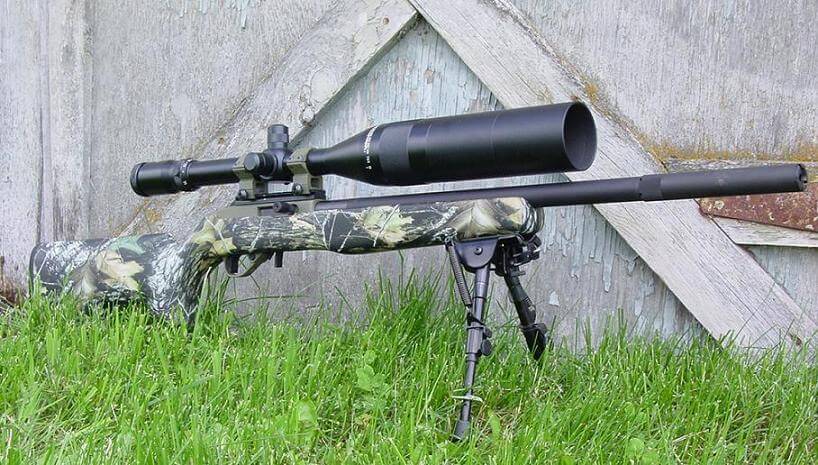
The now-defunct Rimfire Technologies offered a product called the Quantum Heavy Taper Tensioned Barrel for the Ruger 10/22 rifle. The company invested several years of research and development and conducted extensive testing to produce this innovative barrel.
They expressed gratitude to their customers who purchased the .920 Quantum Tensioned barrels and provided valuable feedback, which contributed to the development of this new generation of barrels. These Quantum Barrels offered superior accuracy, reliability, and cycling performance, providing users with new capabilities.
As with all Rimfire Technologies’ barrels and trigger groups, each piece was individually tested and tuned for accuracy at 25 yards before packaging. The company also hinted at the release of new custom parts in the coming months, including regular and low-production items that customers should act quickly to secure.
About AnthonyArms

The market is saturated with products, making it difficult for consumers to make informed decisions about what to purchase. With countless new products and an ever-evolving list of features, it’s easy to become overwhelmed and uncertain about what you really need.
Fortunately, AnthonyArms is here to help. Our mission is to provide you with a carefully curated selection of high-quality products that have been thoroughly tested and vetted. By narrowing down the options for you, we save you both time and energy, allowing you to make an informed and confident decision about your purchase.
Don’t waste your hard-earned money on a product that won’t meet your needs. Trust AnthonyArms to help you find the perfect solution for your unique situation.
Anthony Foster: Founder

A few years ago, I went to a gun show. Wait, let’s go back a bit farther….
Quite a few years ago, I was married. My ex-wife was from another country and that particular country didn’t have the gun rights that we have here. One day, my father-in-law at the time came to the U.S.A. for a visit. Every time he came to this country, he made a point to go to a local gun range that rented guns. This particular visit, he invited me along. I guess it was supposed to be some kind of a bonding thing.
Before that, I had never fired a gun before in my life and to be honest I was a bit nervous around them. Still, he was paying for the rentals and the ammo so who was I to say no?
So, he handed me a .45 caliber Glock, a box of ammo and then went to the lane next to me. It occurred at that point that he probably figured that I, being an American what grew up in the South, knew all there was to know about guns. So, I bumbled my way through loading it, took aim and BLAM!
First shot ever fired. It kicked like a mule and scared the living hell out of me. Still, it was a perfect head shot. I finished off the box (with shaking hands) and thanked him for a fun afternoon then went home and pretty much wrote off guns.
Some years passed and my job required me to have to visit its datacenter about once or twice a month…in the middle of the night…in a less than wonderful part of town…while carrying thousands of dollar’s worth of computer equipment.
Well, time to get a carry permit.
So, there I was at the aforementioned gun show. I found this awesome Taurus PT92 9mm that looked like something straight out of an action film. Admittedly, a bit difficult to conceal but still, if I was going to own a freaking gun, I wanted it to be an awesome looking one (I was so young and naive back then). I took it to the range the next day and had a much more pleasant experience than my first-time years earlier. I was hooked from that point forward.
Hello. My name is Anthony Foster, and I am the founder of AnthonyArms.
Which Leads Me To…
Why “AnthonyArms”? Well, I admittedly haven’t been using guns very long. Even though I bought my first one relatively recently, I haven’t had as much time to shoot it and learn it as I would have liked. Pretty much everything I know is self taught as I haven’t had time or money to hire an instructor/attend classes.
In the process of teaching myself, however, I’ve found most information on the internet seems to assume you’re either an active NRA instructor, ex-police or ex-military. There’s surprisingly little information geared towards a noob and what little there is turns out to be boring and not well organized or somewhat inaccurate (I’m looking at you, 90% of YouTube videos).
The purpose of AnthonyArms.com is to pass on to you the beginner’s things I’ve learned along the way, questions I’ve had that I ultimately had to discover on my own, and observations I’ve made throughout the process.
One More Thing…
One other thing I feel I must get out of the way:
I highly, HIGHLY encourage you to hire an NRA instructor. I am in no way an expert by any stretch of the imagination. Heck, half of what I say here may be so horribly wrong that your average instructor would instantly suffer an aneurism after reading a single paragraph.
This is more of a… supplemental reference. At the very least it’s a wonderful (and hopefully marginally entertaining) compendium of that NOT to do.
The Gun Commandments
There are certain rules you should follow when handling a gun. Actually, they’re not rules. Rules are made to be broken. These are commandments. Etched in stone and never to be broken lest the sprit of Samuel Colt strike you down. Break one of these and chances are you might be ok. Break two of them and bad things are more likely to happen than not.
- Treat every gun as though it were loaded – Not too hard. If you’ve walked away from the gun, do a quick check. Before you do anything, for that matter, drop the magazine and rack the slide and visually inspect the chamber.
- Loaded or unloaded, never point the gun at anything you don’t want killed or destroyed – It’s just a good habit. Mainly because if you forget to do commandment #1, you at least reduce the risk of someone/something getting hurt.
- Be sure of not only your target, but what’s behind it as well – aside from what you’ve seen in movies, bullets don’t always stop once they hit their target. Many times they can continue on for upwards of a mile after passing through something. At the very least, what if you miss your target?
- Keep your finger off the trigger until you’re ready to fire – easy enough to do. Almost completely removes the risk of accidentally firing. I always keep my finger as high up on the gun as humanly possible,
- Drinking and drugs do not mix with guns – don’t be like those idiots you make fun of on the news. “Hey, ya’ll, watch this…”
- Your gun’s safety doesn’t work. Ever. – Don’t depend on your safety. Safeties fail. Of course use them but don’t use them as a substitute for good safety practices.
Finally, this one is my own personal one and not so much a commandment but certainly important: If you are in doubt, ask a question. That whole thing about better to beg for forgiveness than ask permission doesn’t apply with guns. If there is doubt, if there is a misunderstanding, ask someone.
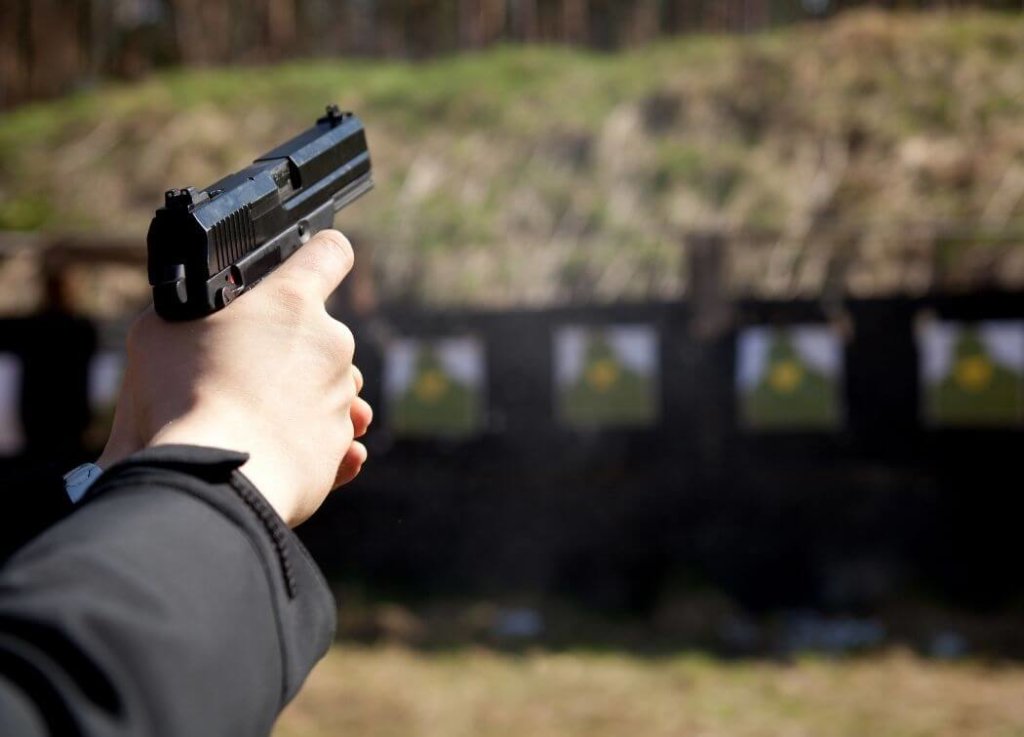
Tips for Your First Time on the Range
Well, you bought your gun. You’ve cleaned all that gunk off that they smear it with before shipping. You’ve done a bunch of dry fire practice and have a good handle on where your trigger break and reset points are. There’s only one thing left to do: Off to the gun range!
Hold on there, Billy, you can’t just walk in and start bustin’ some proverbial “caps” into some paper targets. There are a few things you should know before you head over there. Your very first trip to a range can be a bit intimidating. Don’t hesitate to ask one of the employees any questions you might have.
Trust me, they’d rather answer a beginner’s question than have to worry about the repercussions of a mistake. That being said, here’s some tips to make your first day at the range a bit easier and more importantly: safer.
Rules Are Made to Be Broken…But Not These

First and foremost, every range has different rules. There’s kind of a core set of rules that are relatively universal but there are always some house rules that are unique to each place. Some have caliber limits. Some are testy about what kind of targets you put up.
Some don’t want you rapid firing and would prefer you have two seconds between each shot. There’s even some, although rare, that consider picking up brass (for reloading purposes) to be shoplifting and will press charges*. With the exception of that last one, most of those rules are in place for safety purposes and ranges have very little tolerance for people that don’t follow the rules.
If you don’t want to wind up on the wrong end of a banned list, read them, know them and don’t hesitate to ask questions. Like all things in the gun world, it’s your responsibility to learn the rules. It’s not someone else’s responsibility to tell them to you.
* Sadly, I’m not joking about this and if the place you’re at has this rule I would highly recommend finding another place.
The Curious Case of Gun Cases
Don’t even think of going to the range if you don’t have a gun case. You don’t need some expensive hard shell case. The plastic case your gun came with is perfectly fine. Heck, a small cardboard box is fine. You just don’t want to walk in there openly carrying the gun in your hand. You will get yelled at…or arrested…or both.
Also, and I’m going to type this slowly and in bold letters to make absolutely sure the point is made: Do not, under any circumstances, carry a loaded gun into the range. Unload your gun, make sure it’s unloaded, double and triple check that it’s unloaded before you put it into the case before you leave your house. Gun ranges don’t mess around with this type of thing.
Go With the Flow
Here’s a high level walk through of what to expect from the moment you walk through the front door. Some things might be different depending on your range, for example outdoor ranges have all kinds of different procedures. For indoor ranges, this is essentially what is going to happen on your first trip there:
- Make sure you have your gun unloaded and in its case before you go in.
- Go up to the counter, pay the range fee and buy some paper targets and ammo, if you need it. Just go with the cheapest stuff. You may also have to sign a liability waver.
- Put on your eye and ear protection and then head into the range itself. Some places will walk you in and usher you to a bay. Other ones just hand you your receipt for the fees, point to the door and tell you “have a good time”.
- Set your stuff down on an empty bay. Go ahead and unpack your guns and mags and supplies. Keep your gun pointed down range (“down range” means “towards the far side of range where everyone is aiming and shooting their guns”).
- Somewhere, usually by the door, will be a big stack of cardboard sheets and a staple gun. Take one of your targets and staple it to one of those sheets. You only need one staple per corner. It’s ok to leave your stuff in your bay while you do this. Trust me, no one is going to mess with it. It’s amazing how polite and trustworthy people are when they’re in a small room where everyone is carrying multiple firearms.
- Most indoor ranges have electric target hanger…thingies. They are operated by a switch located inside your bay. Pull the switch in one direction and the clip comes towards you. Push it in the other and it goes further away. Clip your target up then move it down range. Distances are usually marked on the walls or floor. If it’s your first trip, swallow your pride and start with the 7 yard mark. Work your way to the back of the room over several trips.
- This is the fun part: Load up your magazines, load up your gun and shoot.
- When you’re all done, remove your target from the cardboard backing and put it back on the stack you got it from. You can either save or throw away your target, although I like to save mine so I can track my progress. Throw away the empty box your ammo came in. Toss off any brass that may have landed on the counter.
- Finally, most ranges have signs saying “sweep spent brass forward” or something to that effect. If you look around, there’s usually 2 or three brooms laying around. Take one and sweep the spent brass to the other side of the counter and away from the area where people are walking. Essentially: leave your bay cleaner than when you found it.
Watch Where You’re Pointing That Thing!
I mentioned it in #4 of the previous tip but it bears repeating: keep your barrel pointed downrange at all times. Every range has that rule and it will be clearly written on their rules posters. This is too important of an item to just group in with the previous tip.
This is one of those things they don’t mess around with. Think about it: if you’re in an indoor range then you’re in a small concrete room with a whole bunch of people in very close proximity. The cheap range ammo is always full metal jacket ammo which means that if it hits someone, it’s going to keep going.
One person sets their gun down thinking that they were out of ammo. The barrel is pointing across the range rather than down it. As he’s loading the mag, he notices the hammer is still cocked. His OCD kicks in and he quickly reaches down and pulls the trigger to de-cock it. Bad things happen. Remember the commandments and assume every gun is loaded at all times and keep your gun pointed down range.
I Hope They Disinfect Those
I have never been to a range that didn’t have loaner eye and ear protection available…for a “small” fee. Take it from me, they aren’t that good and they are NEVER comfortable. For a couple bucks more than what they charge you at the range, you can get a nice and comfortable set that is 100% yours…and you’ll know exactly how clean they actually are.
No matter what you use, however, make sure you use them. Indoor ranges are usually a bit cramped and filled with shooters. Your hearing won’t survive very long inside without protection. Most ranges will also ask you to leave if you refuse to wear any.
Yes, I’ve seen it. The “they’re my ears, I should be able to destroy them if I want to.” argument did nothing to sway the range officer’s opinion. Speaking of range officers….
By My Divine Right, I Decree That the Line is Hot
Some ranges have a person called a “Range Officer”. On ranges that have one, that man or woman is your king/emperor/god. What they say goes and you are not allowed to argue with them. These people aren’t on some kind of power trip.
Their job, their sole purpose for existing is to make sure that you and everyone else in the room is as safe as humanly possible. It is a difficult job and one they don’t take lightly. If they make a mistake, if they miss one detail, there’s a good chance that someone will die. Keep that in mind when they’re telling you to do something. That range is their world and they’re graciously allowing you to shoot in it.
Firstie’s!
For just about every gun range, the bays are first come first serve. Once you’re there, that bay belongs to you and the only person that can tell you to leave are the employees. That being said, don’t be a jerk about it. Don’t just set your stuff down then go for a walk.
Claim your bay, prep your target, load up and fire your ammo. When you’re all done, pack up, clean up and get out as quickly as possible so that other fellow gun owners may enjoy themselves. Most ranges only have a dozen or so bays so everyone needs to be considerate about things.
That Line There? Pretend It’s The Grand Canyon
When you get into your bay, there will be a counter or some kind of table. Just on the other side of that table will be a bright red line painted on the floor. Even if there isn’t a line, pretend there is. Never cross that line. You will die.
I don’t care if you drop your $5000 Custom Match-Grade 1911 over it, go get an employee and they will call a cease fire and retrieve it for you. It’s like they tell you at Disney: Keep your hands, arms, feet and legs inside the ride at all times until the ride has come to a complete stop and the driver calls all clear.
Pro Tip: Yes, You Can Rent Them
Some ranges actually let you rent guns. There’s usually a dozen or so to choose from and you should take advantage of it. This is a great way to check out different styles and calibers.
Even before you ever buy your first gun, see if any of your local ranges rent guns and go give it a shot. Keep in mind, these guns are usually maintained just enough to keep them working (if that). They are going to be a bit on the dirty and abused side. Still, it’s a cheap way to try some different guns out.
Pro Tip Part II: Flattery Will Get You Everywhere
There’s something very unique about gun owners. We are a very proud group. We love our guns and love to show them off. We’re also, for the most part, a generous lot.
I’ll give you an example: I was at the range one day and, between magazines, I noticed that the person in the next bay over had a very nice pistol. He happened to be reloading his mags at the same time, so I complimented him on it. His reply threw me completely off guard: “Thanks! I love this thing. I’ve got a bunch of others, but I usually wind up just shooting this one. Would you like to take a couple shots?”
This complete stranger was offering me his gun and his ammo. I politely declined as I was still new to shooting and, as a result, was afraid I’d somehow damage his gun. The thing is, this wasn’t an isolated incident. I’ve had more than one person offer the use of their gun after I’ve complimented their pistol.
That’s never happened to me with any of my other hobbies. Not once has another golfer at the driving range says “here, try out my driver”. Nor have I ever heard “here, try driving my 1957 Chevy around the block” or “go ahead and do a couple touch and go’s with my Cessna”.
I’d say more often than not, however, gun owners have generously offered their guns to me, and I have since offered mine to quite a few people as well. With guns, and frankly with life, a little sincere flattery goes a long way. Just make sure you let them offer. Don’t just ask “hey, can I play with your gun?!” Also, if you’re going to talk to anyone, make sure it’s not while they’re actually shooting.